🪐 Apollo 🛸 AI Compute Cluster for the GPU Poor
· Prayag Bhakar · Hardware · 1,698 words · 9 min read · Grade 6
Hey, Prayag here! Are you GPU Poor but want to spend your money wisely on that shiny brand new deep learning compute cluster? Well stop looking at the newest and greatest and start scavenging for used PC hardware!!
1 The Build
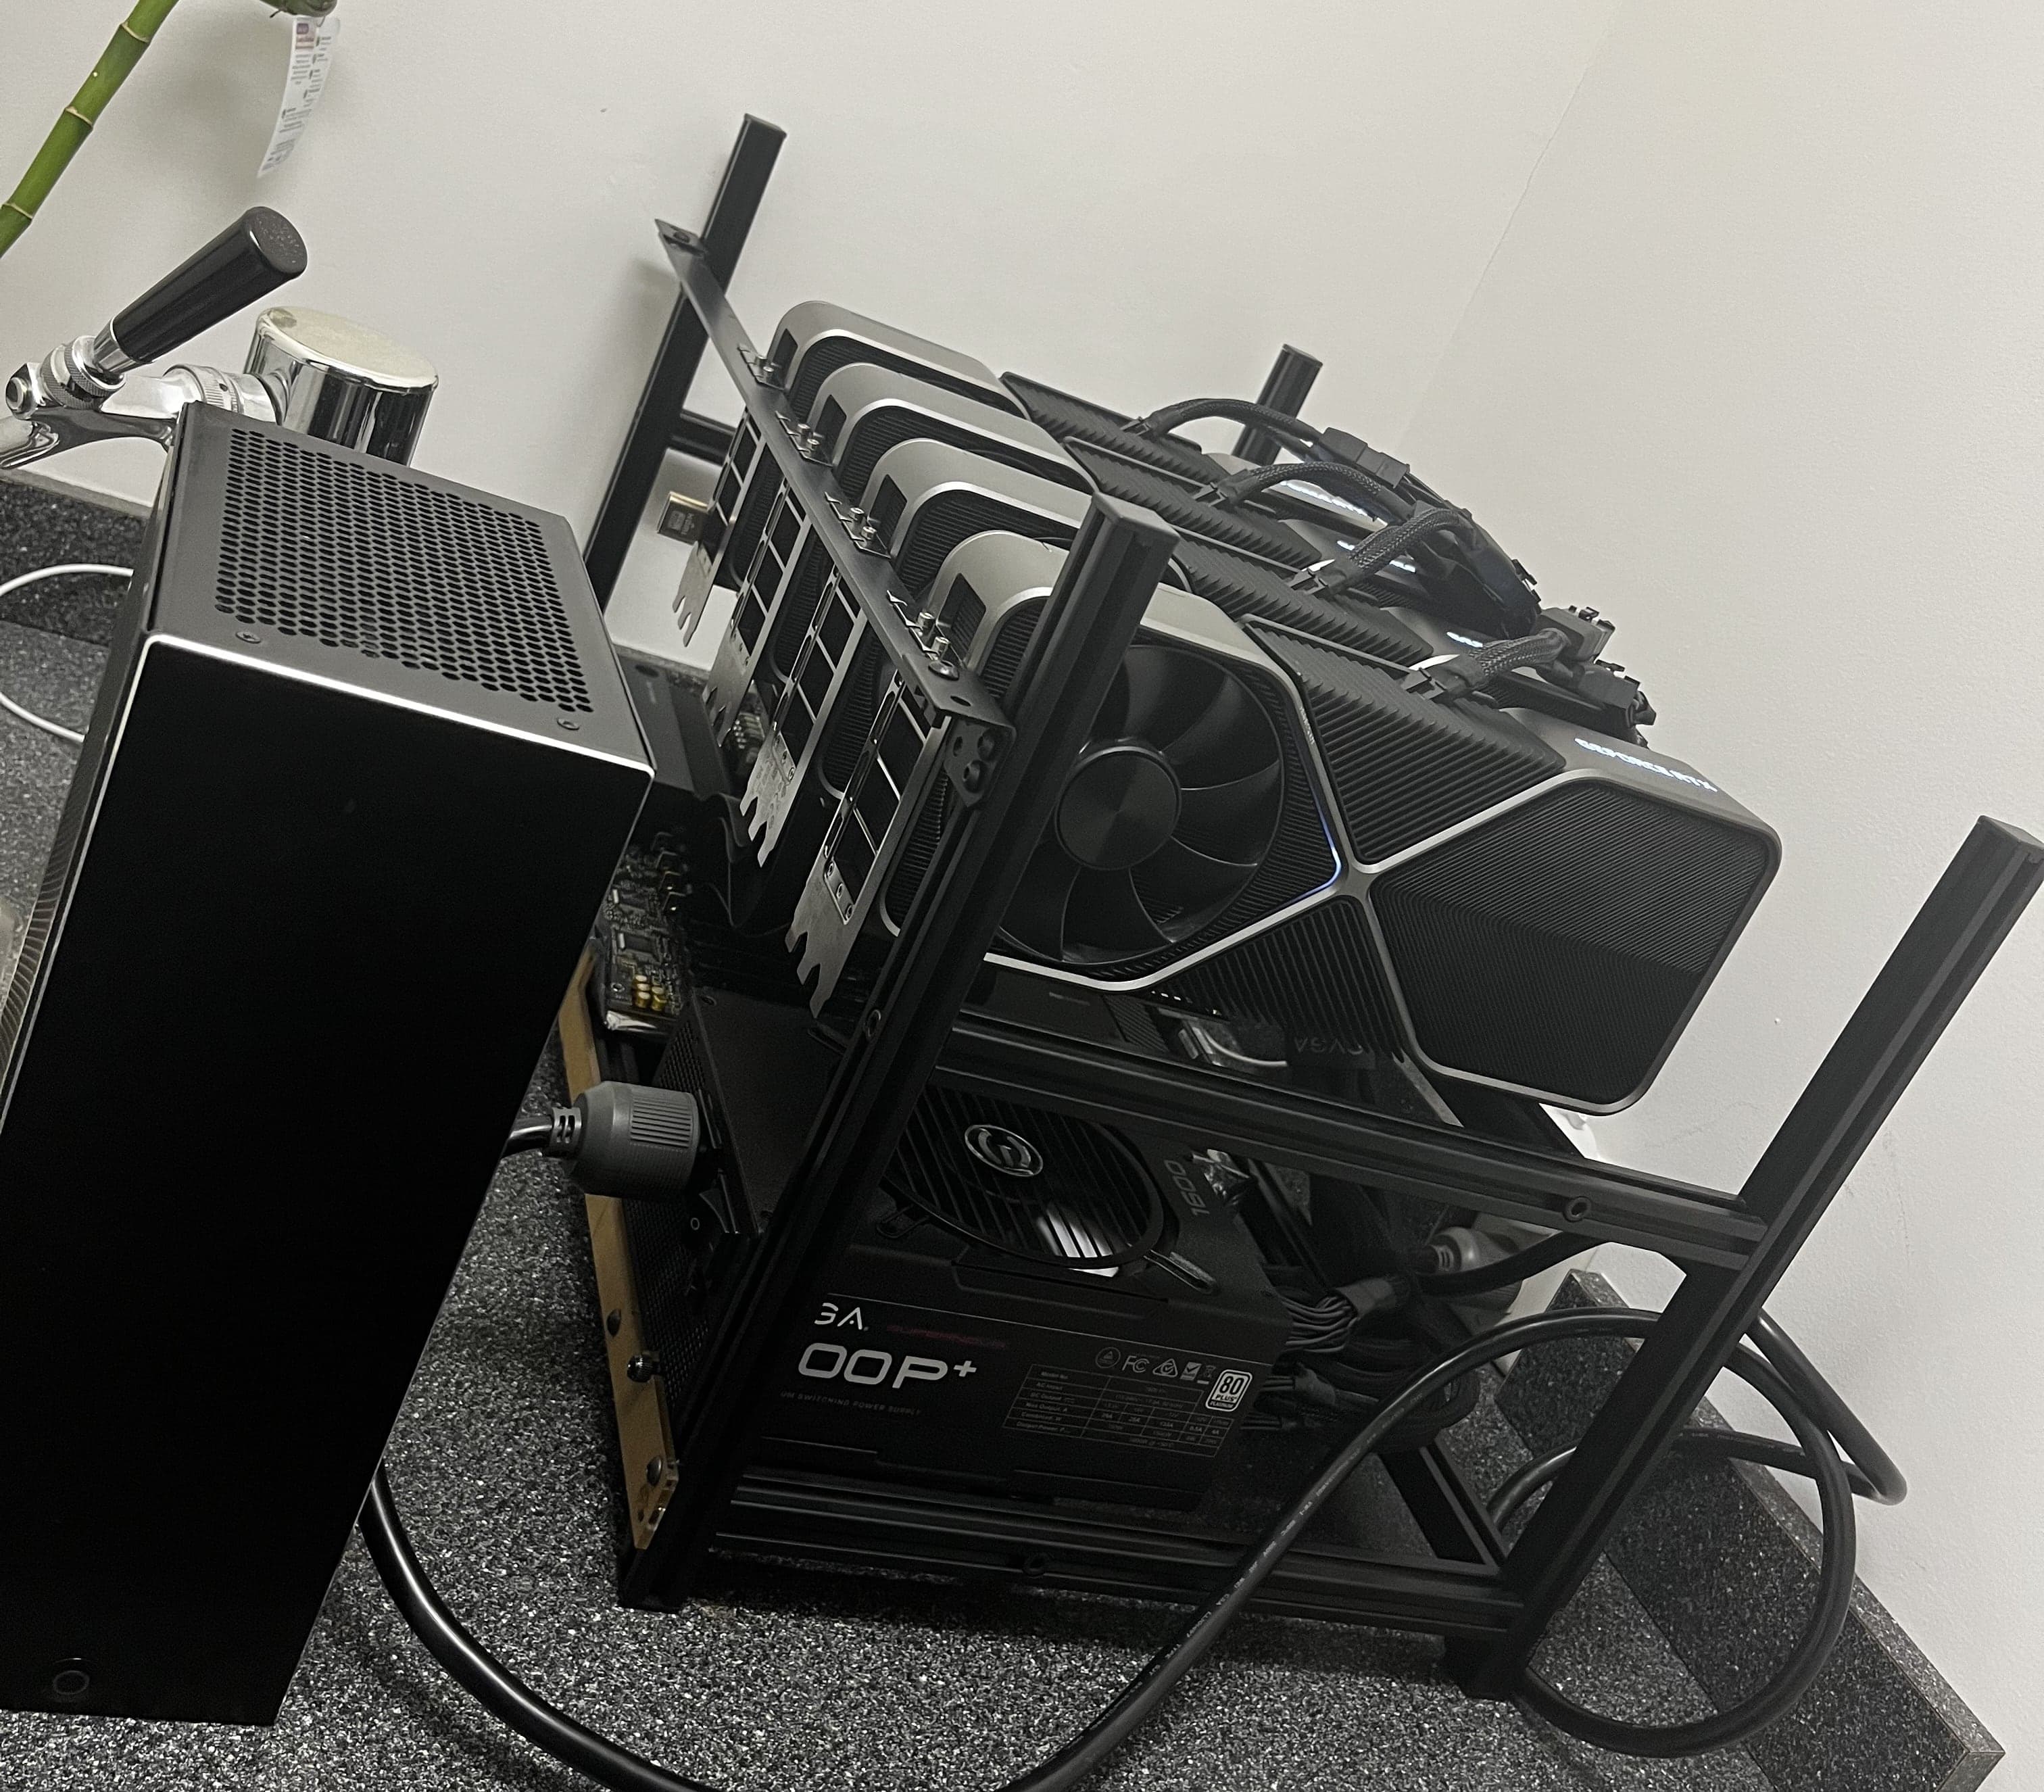
Since the goal of this cluster is to keep the price low while getting as much VRAM and compute we can, used hardware is the only place were going to find any bang for our buck. Newer GPUs and hardware is getting caught up in the Transformer and Crypto hype. So I turned to what countless other server enthusiasts have done before me: buy stuff from good ol' eBay.
Here's a breakdown.
| Part | Price | Notes |
|---|---|---|
| ASUS Pro WS WRX80E-SAGE SE | $620 | 2x 10G LAN, Supports 4xSLI, Plenty of SATA and IO |
| Ryzen Threadripper Pro 3945wx | $577 | Most AI workload are GPU bound, but if you plan on using this for other server things, consider a beefier CPU. |
| CPU Cooler | $105 | |
| Samsung M386A8K40BM1-CRC | $338 | 4 x 64GB, I also bought some aftermarket heatsinks to help keep the ram cool. |
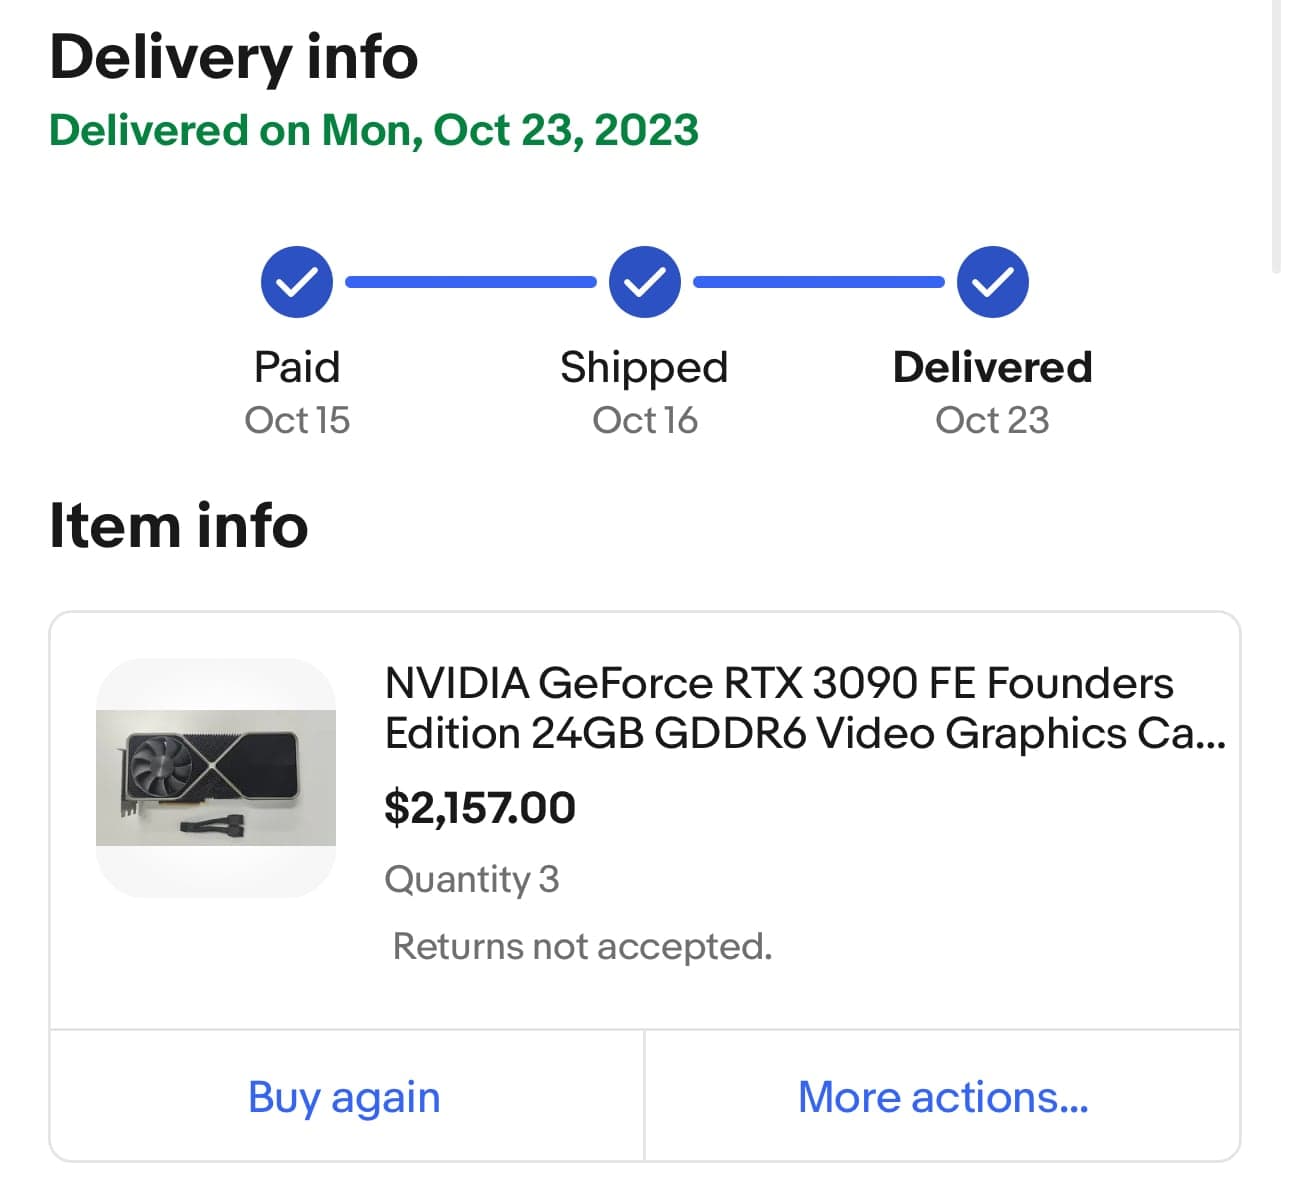
| Nvidia RTX 3090 Founders Edition | $789 3x $772 | |
| NVLINK bridge | 2x $150 | The 4 slot and 3 slot bridges work best here. If your GPU is small enough and you have the proper cooling, you might even be able to go for the A6000 2 slot bridge. |
| PCIE riser cables | 4x $62 | |
| m.2 to sata splitter | $45 | |
| m.2 SSD | $75 | 500GB, current boot drive |
| $215 | 2TB, future boot drive | |
| Renewed HDD | 6x $106 | Cheap Western Digital Ultrastar 10TB because it was used and had PWDIS. I am using SATA power adapters 😱 to get around it but I really need to buy a 🧯 fire extinguisher just in case. ❤️🔥 |
| 4x $140 | 10TB Seagate, learned by lesson about PWDIS this time 🤕 | |
| PSU | $328 | EVGA SuperNova 1600 P+ with 80+ Platinum rating to help lower the power bill. This is the only big thing I bought new as I did not want to take ant chances. |
| GPU Mining Case | $35 | the motherboard ended up not actually fitting |
| HDD Rack | 2x $35 | |
| Cables + Zip ties | $140 |
For about $7,000 after taxes and delivery fees, we get a WHOPPING 24 threads, 256 GB ram, 96GB VRAM, and 60TB usable storage in Raid 6. AND its compact enough to fit in the closet (with enough ventilation).
2 Setup
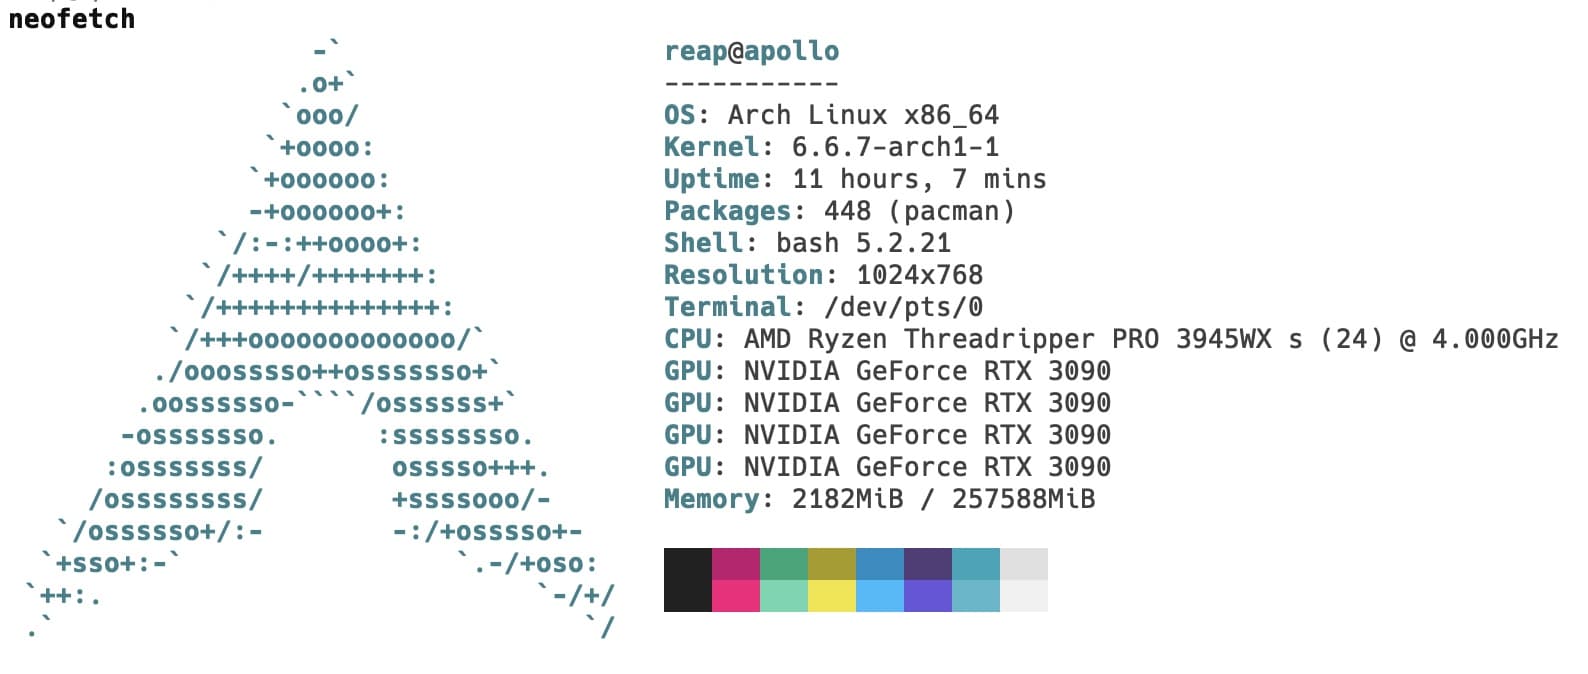
With a built server, we can now boot up into Linux. In case you couldn't tell from the neofetch output, I use Arch by the way(tm). And yes with systemd instead of a init system that hasn't been updated in a year. Head on over here if you are unfamiliar on how to get started with Arch.
2.1 BIOS
First things first, lets boot into the BIOS to fix up some settings.
$ systemctl reboot --firmware-setup- Flash the most recent BIOS. This should help avoid issues that have already been fixed.
- Enable SVM Mode.
- Turn on Single Root I/O Virtualization (SR-IOV). This will help when you eventually have multiple containers/vms/pods running and sharing the compute.
- Set all the PCIE lanes to v3. The motherboard has difficulty automatically figuring out the PCIE versions when using the PCIE risers. Setting it to 3.0 allows the system to boot, where as leaving it on auto gives motherboard errors.
- Check that the RAM is working at the correct speed.
- Check that the boot drive is set correctly.
Ensure the motherboard is looking for the GPU over PCIE to avoid having issues connecting to the GPU. The wrx80e has a VGA switch that needed to be turned off for the GPUs to work correctly.
2.2 Nvidia
Now comes everyone's favorite part, getting the Nvidia Linux driver and CUDA working correctly.
2.2.1 Setup
0️⃣0️⃣ NVIDA Drivers
For the GPU drivers we're going to use Dynamic Kernel Module Support (DKMS) to allow the system to easily swap between driver versions. This will be good if we ever need to upgrade or downgrade the drivers.
$ yay -S dkms

# Check if your system detects the GPUs
$ lspci | grep -e VGA -e 3D
$ yay -S nvidia nvidia-utils nvidia-settings
# (optional, but reccomended)
$ yay -S linux-headers
0️⃣1️⃣ CUDA
$ yay -S cuda

# update the path to add CUDA libs
$ echo 'export PATH=/opt/cuda/bin:$PATH' >> ~/.bashrc
$ echo 'export LD_LIBRARY_PATH=/opt/cuda/lib64:$LD_LIBRARY_PATH' >> ~/.bashrc
0️⃣2️⃣ nvidia-persistenced
$ sudo systemctl enable nvidia-persistenced
$ sudo systemctl start nvidia-persistenced
2.2.2 Validation
After the reboot the system should look something like this.
0️⃣0️⃣ Nvidia Drivers
$ nvidia-smi
Sun Dec 24 04:04:49 2023
+---------------------------------------------------------------------------------------+
| NVIDIA-SMI 545.29.06              Driver Version: 545.29.06    CUDA Version: 12.3     |
|-----------------------------------------+----------------------+----------------------+
| GPU  Name                 Persistence-M | Bus-Id        Disp.A | Volatile Uncorr. ECC |
| Fan  Temp   Perf          Pwr:Usage/Cap |         Memory-Usage | GPU-Util  Compute M. |
|                                         |                      |               MIG M. |
|=========================================+======================+======================|
|   0  NVIDIA GeForce RTX 3090        On  | 00000000:01:00.0 Off |                  N/A |
|  0%   31C    P8               7W / 350W |      3MiB / 24576MiB |      0%      Default |
|                                         |                      |                  N/A |
+-----------------------------------------+----------------------+----------------------+
|   1  NVIDIA GeForce RTX 3090        On  | 00000000:2B:00.0 Off |                  N/A |
|  0%   34C    P8              10W / 350W |      3MiB / 24576MiB |      0%      Default |
|                                         |                      |                  N/A |
+-----------------------------------------+----------------------+----------------------+
|   2  NVIDIA GeForce RTX 3090        On  | 00000000:41:00.0  On |                  N/A |
|  0%   31C    P8              12W / 350W |      3MiB / 24576MiB |      0%      Default |
|                                         |                      |                  N/A |
+-----------------------------------------+----------------------+----------------------+
|   3  NVIDIA GeForce RTX 3090        On  | 00000000:61:00.0 Off |                  N/A |
|  0%   34C    P8              17W / 350W |      3MiB / 24576MiB |      0%      Default |
|                                         |                      |                  N/A |
+-----------------------------------------+----------------------+----------------------+

+---------------------------------------------------------------------------------------+
| Processes:                                                                            |
|  GPU   GI   CI        PID   Type   Process name                            GPU Memory |
|        ID   ID                                                             Usage      |
|=======================================================================================|
|  No running processes found                                                           |
+---------------------------------------------------------------------------------------+
0️⃣1️⃣ CUDA
$ nvcc --version
nvcc: NVIDIA (R) Cuda compiler driver
Copyright (c) 2005-2023 NVIDIA Corporation
Built on Fri_Nov__3_17:16:49_PDT_2023
Cuda compilation tools, release 12.3, V12.3.103
Build cuda_12.3.r12.3/compiler.33492891_0
0️⃣2️⃣ nvidia-persistenced
$ systemctl status nvidia-persistenced
● nvidia-persistenced.service - NVIDIA Persistence Daemon
     Loaded: loaded (/usr/lib/systemd/system/nvidia-persistenced.service; enabled; preset: disabled)
     Active: active (running) since Sat 2023-12-23 09:05:34 UTC; 18h ago
    Process: 787 ExecStart=/usr/bin/nvidia-persistenced --user nvidia-persistenced (code=exited, status=0/SUCCESS)
   Main PID: 790 (nvidia-persiste)
      Tasks: 1 (limit: 308982)
     Memory: 908.0K (peak: 1.7M)
        CPU: 1.272s
     CGroup: /system.slice/nvidia-persistenced.service
             └─790 /usr/bin/nvidia-persistenced --user nvidia-persistenced

Dec 23 09:05:26 apollo systemd[1]: Starting NVIDIA Persistence Daemon...
Dec 23 09:05:26 apollo nvidia-persistenced[790]: Started (790)
Dec 23 09:05:34 apollo systemd[1]: Started NVIDIA Persistence Daemon.
0️⃣3️⃣ NVLINK
If NVLINK isn't showing up then make sure connector is fully connected
$ nvidia-smi nvlink --status
GPU 0: NVIDIA GeForce RTX 3090 (UUID: GPU-...)
	 Link 0: 14.062 GB/s
	 Link 1: 14.062 GB/s
	 Link 2: 14.062 GB/s
	 Link 3: 14.062 GB/s
GPU 1: NVIDIA GeForce RTX 3090 (UUID: GPU-...)
	 Link 0: 14.062 GB/s
	 Link 1: 14.062 GB/s
	 Link 2: 14.062 GB/s
	 Link 3: 14.062 GB/s
GPU 2: NVIDIA GeForce RTX 3090 (UUID: GPU-...)
	 Link 0: 14.062 GB/s
	 Link 1: 14.062 GB/s
	 Link 2: 14.062 GB/s
	 Link 3: 14.062 GB/s
GPU 3: NVIDIA GeForce RTX 3090 (UUID: GPU-...)
	 Link 0: 14.062 GB/s
	 Link 1: 14.062 GB/s
	 Link 2: 14.062 GB/s
	 Link 3: 14.062 GB/s
$ nvidia-smi topo -m
GPU0 GPU1 GPU2 GPU3 CPU Affinity NUMA Affinity GPU NUMA ID
GPU0 X SYS SYS NV4 0-23 0 N/A
GPU1 SYS X NV4 SYS 0-23 0 N/A
GPU2 SYS NV4 X SYS 0-23 0 N/A
GPU3 NV4 SYS SYS X 0-23 0 N/A
Legend:
X = Self
SYS = Connection traversing PCIe as well as the SMP interconnect between NUMA nodes (e.g., QPI/UPI)
NODE = Connection traversing PCIe as well as the interconnect between PCIe Host Bridges within a NUMA node
PHB = Connection traversing PCIe as well as a PCIe Host Bridge (typically the CPU)
PXB = Connection traversing multiple PCIe bridges (without traversing the PCIe Host Bridge)
PIX = Connection traversing at most a single PCIe bridge
NV# = Connection traversing a bonded set of # NVLinksIf you see AER errors on boot then you need to enable the DRM kernel mode setting.
- Edit the relevant loader in
/boot/loader/entries/ - Add
modeset=1 fbdev=1to the end of the options line
2.3 Power Management
Okay, now lets address the elephant in the room. How the heck is a 300W CPU and 4 350W GPUs going to fit in a 1600W PSU? And thats not even including the power needed for the rest of the system!
To get around this, we will set the total power limit to 250W for now to avoid tripping any fuses. This change will drop the performance of the system but also drop the temperature and heat produced.
To start let's create a new systemd service in /etc/systemd/system/.
# nvidia-power-limitd.service
[Unit]
Description=NVIDIA settings on startup
After=syslog.target

[Service]
Type=oneshot
EcecStart=nvidia-smi -pm 1
ExecStart=/usr/bin/nvidia-smi -pl 250
RemainAfterExit=no

[Install]
WantedBy=multi-user.target
And enable it so that it runs on boot.
$ sudo systemctl enable nvidia-power-limitd3 Lessons Learned
-
Use as much off the shelf hardware to save money.
-
Think outside of the box.
In order to fit all of this into a standard PC case I would have had to put a lost more money and time into getting it to work. By just using the same cheap stuff the Crypto bros use, I saved a lot of time and money.
RAM goes in the top 4 slots first.
For 4x SLI support, GPUs need to be connected in PCIE lanes 1, 3, 5, and 7.
-
Sometimes unplugging a cable and plugging it back in, is the correct answer.
-
Buy in bulk and bid around!
- Accept Reality
Training Meta's LLAMA took 3.7M GPU hours on A100-80GB1, training Meta's LLAMA 2 took 3.3M GPU hours on A100-80GB2, training TinyLlama took 3456 GPU hours on A100-40GB3, training Microsoft's Phi 2 took 33K GPU hours on A100-80G4 training Microsoft x OpenAI's ChatGPT costs Iowa ~431 million gallons of water5.
Your not that guy pal. Trust me. Ok? Eventually you will have to use cloud services to scale up to have your bigger models, faster inference for production load, and the occasional Joker moment. However, having an on prem system allows for failed attempts to be less costly. Those cloud storage fees can get pricy!
4 Whats next?
Well the system seems stable enough when I'm running ComfyUI and Jupyter Notebooks. However there is still more work left to do.
- Find out how much performance is lost due to the power draw limit. How much more can we squeeze out of it?
- Test the hard drives to make sure they aren't on their last leg.
- Screw everything onto the "case"
- So uh, what can we run on here?
- We still have 3 open PCIE lanes...
- Docker? K3S? Quantum Containers?
Footnotes
[ORPHAN_NODE // AWAITING_UPLINK]